Home automation – Controlling cars (part 2)
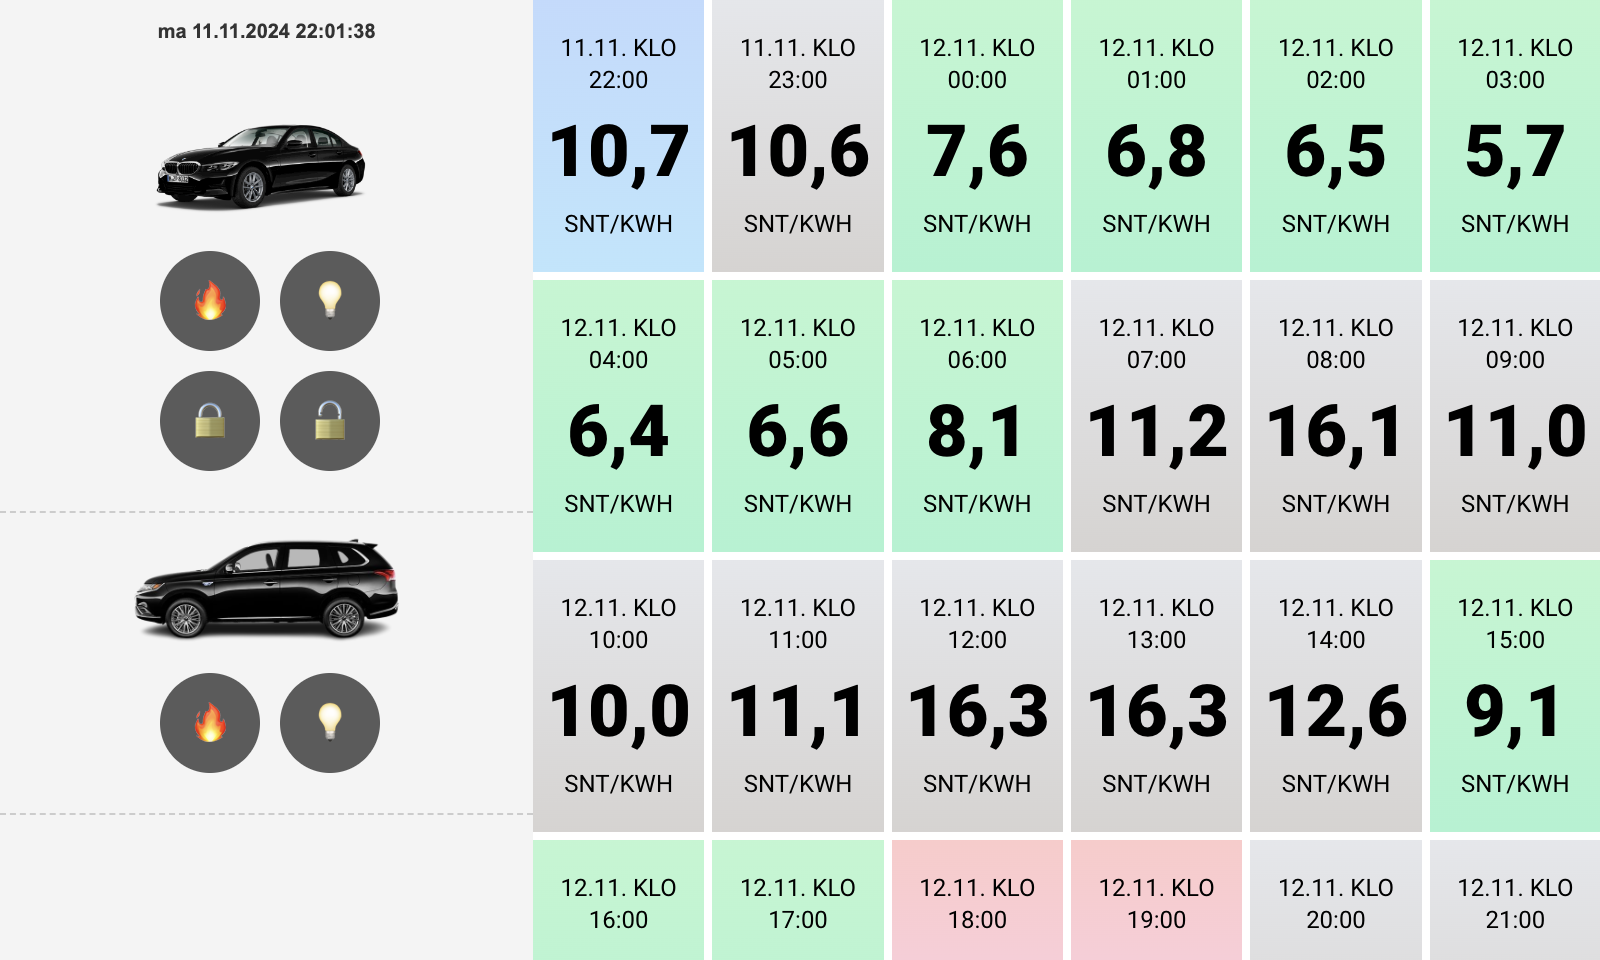
This is the second part of the home automation series. In the first part, I built a dashboard for displaying the hourly electricity price. Now I wanted to connect my cars to the system.

Connecting to the BMW
I did end up using the ConnectedDrive API thorugh Colin Bendell's npm package. Here is how.
-
Install BMW Remote Control
Install the package:bash~~ ~~sudo apt install -y nodejs npm~~ ~~npm install -g https://github.com/colinbendell/bmw~~ ~~Update 4.10.2025: Veikko solved the hcaptcha issue, but I used my own fork with improved error handling:
sudo apt install -y nodejs npm sudo npm install -g https://github.com/infr/bmw -
Set Up Credentials
Create~/.bmw:nano ~/.bmwAdd your ConnectedDrive credentials to
~/.bmw:[default] email=your@email.com password=password geo=row hcaptcha_sitekey=10000000-0000-0000-0000-000000000000Note: You can get the captcha token from the bimmer-connected documentation. The first login requires solving a captcha, but subsequent logins using refresh tokens do not require it.
-
Login and Access Vehicle
Now you can log in and control the vehicle from the command line:bmw login bmw list # You will get the VIN of your vehicle bmw lock <VIN> bmw climate <VIN> -
Example Output
Logging in
$ bmw login
Success!
Listing your vehicles
$ bmw list
330e 2019 (WBA5XXXXXXXXXXXXXX)
Getting the status
$ bmw status WBA5XXXXXXXXXXXXXX
 330e 2019 (WBA5XXXXXXXXXXXXXX):
 🏁 Odometer: 70 000 km
 🔧 iDrive7: 7/2021.85
 📍 Location: Rautatientori 1, 00100 Helsinki (60.XXX,24.XXX)
 🚪 Doors: Unlocked
 🪟 Windows: Closed
 🔋 Battery: 100% (258 km)
 🔌 Pluged In
Locking the car
$ bmw lock WBA5X7XXXXXXXXXXX
330e (WBA5X7XXXXXXXXXXX): Locking... Success.
Starting the heater / climate control
$ bmw climate WBA5X7XXXXXXXXXXX
Starting Climate... Success.
Building a site that can send commands to the car
For calling the npm package from the display I did a simple html site and a FastAPI backend. Here it is, the Home Display repository.
It sends the commands to the node package with subprocess like this:
import subprocess
subprocess.check_output("bmw climate WBA5X7XXXXXXXXXXX", stderr=subprocess.STDOUT)
To get it up and running clone the repository and install the dependencies:
git clone https://github.com/infr/home-display

cd home-display
python3 -m venv venv
source venv/bin/activate
pip install -r requirements.txt
Running the site on the Raspberry Pi
Configure a systemd service to run the FastAPI backend on boot:
sudo nano /etc/systemd/system/uvicorn.serviceAdd the following content to uvicorn.service:
[Unit]
Description=Uvicorn Server
After=network.target

[Service]
User=pi
WorkingDirectory=/home/pi/home-display
ExecStart=/home/pi/home-display/venv/bin/uvicorn main:app --host 0.0.0.0 --port 8990

Restart=always

[Install]
WantedBy=multi-user.target
Set up the service to run on boot:
sudo systemctl daemon-reload
sudo systemctl enable uvicorn.service
sudo systemctl restart uvicorn.service
sudo systemctl status uvicorn.service
Add the site to autostart:
sudo nano /etc/xdg/lxsession/LXDE-pi/autostartAdd the following content to autostart, I have an older Raspberry Pi 3 B+ so I had to use some sleep and disable flags:
@touch /home/pi/autostart_test.txt
@lxpanel --profile LXDE-pi
@pcmanfm --desktop --profile LXDE-pi
@xset s off
@xset -dpms
@xset s noblank
@/bin/sleep 30 && chromium-browser --kiosk --disable-gpu --disable-software-rasterizer --no-sandbox http://localhost:8990I wanted to pull the changes from the git repo once in a while: crontab -e
0 */12 * * * cd /home/pi/home-display && git pull && sudo systemctl restart uvicorn.serviceTo allow the cron job to run sudo: sudo visudo
pi ALL=NOPASSWD: /bin/systemctl restart uvicorn.service
Lastly emojies were not showing up so you need to separately install them:
sudo apt update
sudo apt install fonts-noto-color-emoji
fc-cache -f -v
And restart Chromium.
Next Steps
- Maybe buy a newer Raspberry Pi since the memory is running out.
- Add Mitsubishi controlling with phevctl.
- Connect a Zigbee dongle to control the IKEA home lighting.
- Monitor temperature with Ruuvi tags.